fbpx

How to Install a Speed Hump in Less Than 30 Minutes!

Share This Post

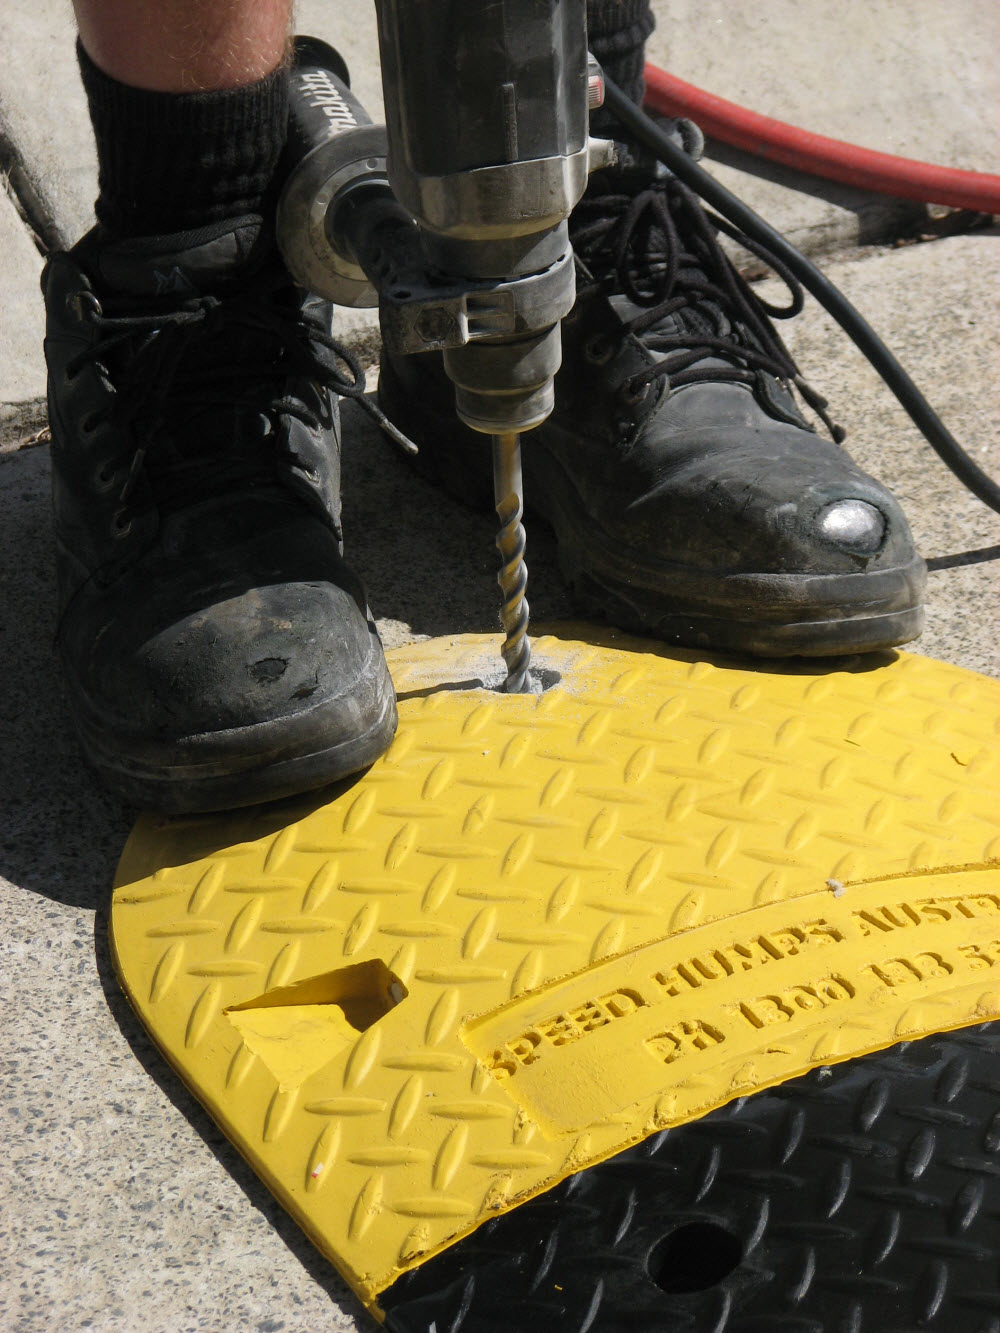
Speed Humps Australia Pre Drilling of HolesThe installation of a standard length Speed Hump is a Quick and Simple process that can easily be performed by anyone with a little common sense and the right equipment. Alternatively Speed Humps Australia can arrange for one of our qualified installers to complete the installation for you. We are also available to provide a FREE,  NO OBLIGATION, on-site quotation for your requirements.

Included in this post is a short 3 minute Installation Video for your reference, followed by a more detailed outline of the 8 Simple Steps to Install a Speed Hump in less than 30 Minutes and all the suggested equipment required for a simple, hassle free installation.

Should you have any questions or require any further details please give us a call on 1300 138 568.

8 Quick and Simple Steps to Install a Speed Hump in less than 30 Minutes!

Step 1

  • Arrive on site, check your surroundings and unload and unpack the Speed Humps.
  • Locate all installation fixing bolts and washers supplied with the product.
  • Dispose of rubbish and ensure site is clean and free of obstacles.

Step 2

  • Place Speed Humps in location to be installed and using tape measure correctly position the Speed Humps.


Step 3

  • Using the guide holes in the Speed Hump, drill through the hump using a 12 mm diameter concrete drill bit.
  • Run drill up and down the completed hole to ensure the hole is clean and of the correct depth.

Step 4

  • Blow all residue dust from holes using air compressor and dust blower attachment.
CRITICAL STEP: If installation is in concrete, ALL dust must be removed from hole and ensure hole is CORRECT depth for supplied fixings. If holes are not cleared of residue, dust fixings will not be able to be completely installed and may bend.
Step 5
  • Drive supplied fixings, with washers, into clean holes using a mini sledgehammer. Be sure to drive in fixings straight.
  • Hammer fixings to a point where the washer sits firm, but not tight, onto the heavy duty rubber seat in the counter sunk Speed Hump fixing hole.
NOTE: Do not drive fixings too tight that it causes tearing of the rubber seat.
CRITICAL STEP:
– Concrete Installation: a small amount of liquid adhesive can be applied to the fixing thread before inserting into hole. DO NOT apply liquid adhesive to the concrete hole.
– Bitumen Installation: apply liberal amount of liquid adhesive to the hole before inserting fixing.
Step 6
  • Use punch to firm fixings and washer onto heavy duty counter sunk rubber seat.
Step 7
  • Clean dust from the Speed Hump and surrounding installation site.
Step 8
  • Final clean and presentation of the Speed Hump using a simple tyre shine and a rag.
Pack Up Site! Job Well Done!
Suggested Equipment for Installation:
  1. Personal Protection Equipment including, Steel Cap Boots, Hi-Vis Shirt or Vest, Dust Mask, Ear Muffs and Protective Eye Wear
  2. Tape Measure
  3. Concrete/Rotary Hammer Drill
  4. 12mm Diameter Concrete Drill Bit
  5. Liquid Adhesive, either Hilti or the cheaper No More Nails will suffice
  6. Generator for Power Source
  7. Power Cord Extension
  8. Air Compressor and Dust Blower attachment
  9. Mini Sledgehammer
  10. Bolt Punch
  11. Broom, Dust Pan and Brush
  12. Cleaning Rags and Tyre Shine

More To Explore

KFC Berrinba Central Drive thru Rumble Bars

Safety Enhancements for Drive-Thru Fast Food Outlets

The Role of Speed Humps and Rumble Bars In the fast-paced environment of fast-food drive-thrus, ensuring safety and efficiency is paramount. One effective measure to enhance safety is the installation of speed humps and rumble bars. These traffic calming devices not only help in managing
Read More »
Shopping cart0
There are no products in the cart!
Continue shopping

get a quote

Need help speccing your project? Use our form to get a quote today